H5P Course Presentation
Here's the Course presentation we'll create in this tutorial:
The Course presentation content type allows you to create a slide-based presentation of your learning material. Elements such as slide titles, links, pictures, audio and video clips, as well as various quiz types can be embedded seamlessly right into the presentation for a richer learning experience.
You can interact with the above H5P Course presentation. Navigate between the slides by using the navigation bar below the slides.
When To Use Course Presentations
Course presentation enables you to author and deliver your course material directly in your browser. Course presentations contain slides where you can add various multimedia and interactive elements to engage the learner.
Course presentations are used when you want to package a piece of learning content in a structured and interactive format. Learners swipe through slides to experience the learning material while solving various quizzes or watching videos along the way.
Try Course presentations as an alternative to presenting your learning content as Powerpoint presentations, PDFs or text-based web pages. Course presentations are very flexible to use, as they are simple to create, publish and edit.
Step 1: Topic
We'll choose video games as the topic for our Course presentation. We'll use the Wikipedia article about the history of video games as background material for our Course presentation.
Let's create three slides, with a test at the end:
- Slide 1: Brief history of computer games
- Slide 2: 2D games
- Slide 3: 3D games
- Summary
Step 2: Creating a Course Presentation
Select the New content option and choose Course presentation from the list of content types:
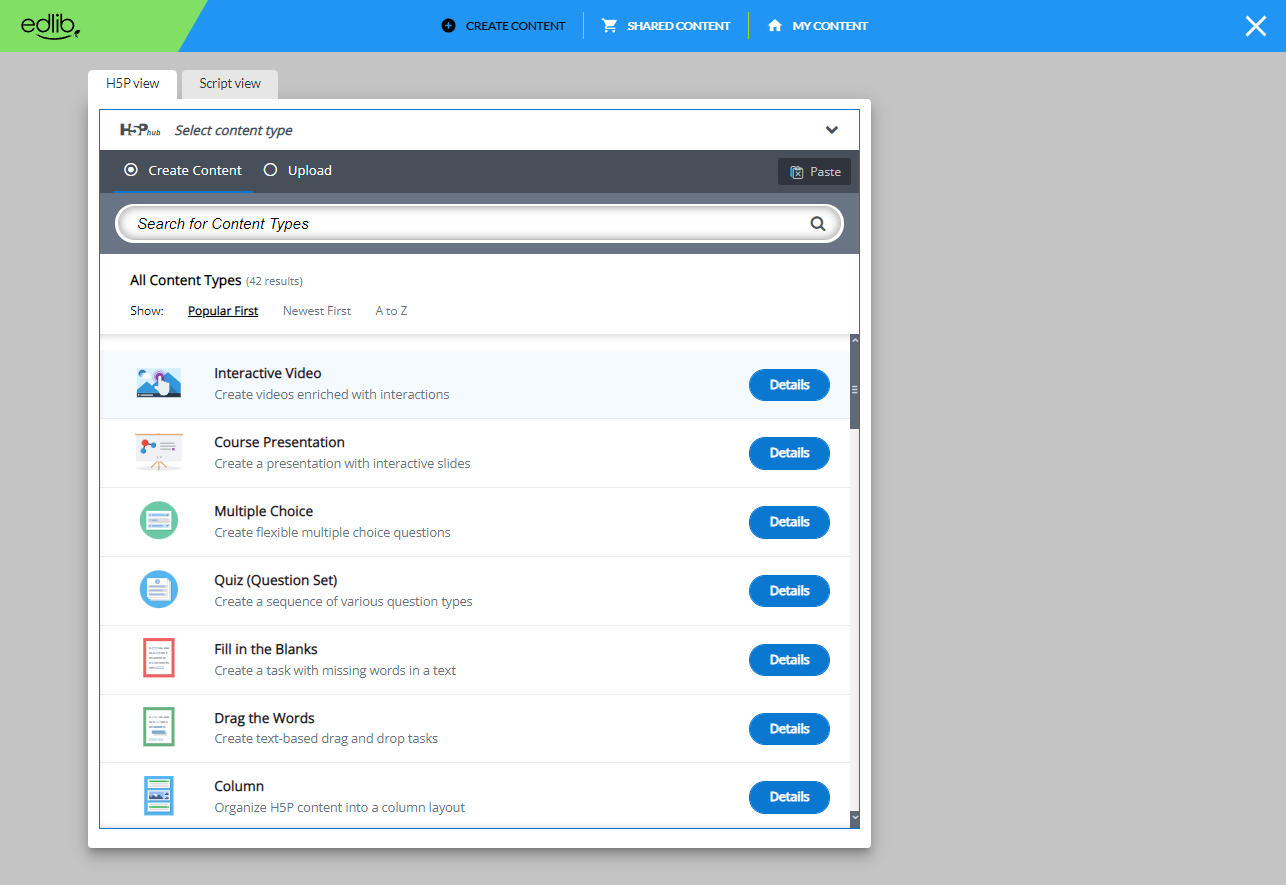
Image: H5P content type selector
Step 3: Course Presentation Editor
The Course presentation editor should now appear. When starting to edit a Course presentation the editor looks like this:
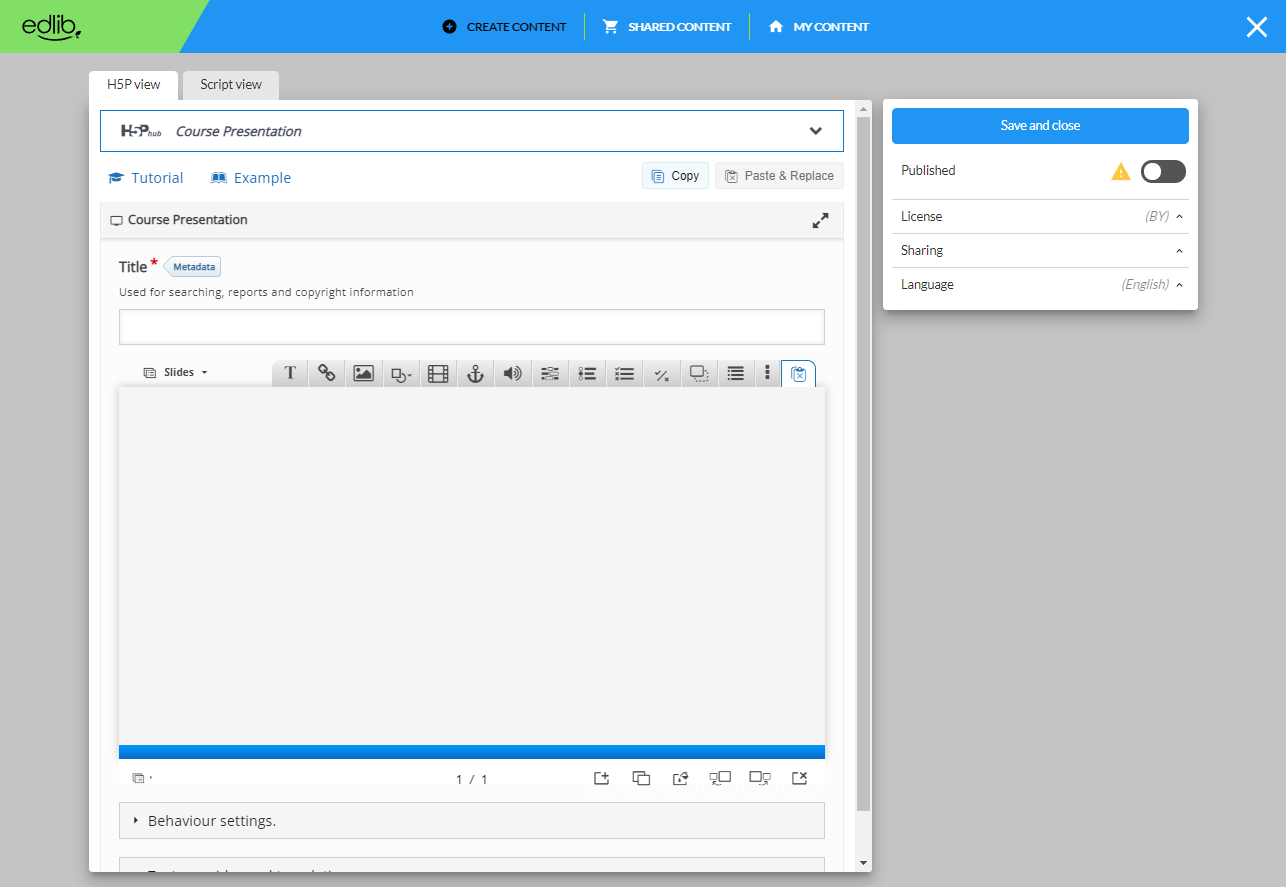
Image: Blank H5P Course presentation editor
In this tutorial, we'll focus on creating the Course presentation content. The content creation happens in the top part of the editor, so we'll only focus on this for now.
The Course presentation editor is WYSIWYG. The end-user view of the Course presentation will look very similar to the editor's view.
Step 4: Slide 1
We'll start by adding a slide in the slides panel to the left. The slide titles can be used to navigate between the slides. You can remove the slides panel entirely by pressing the Remove slides button. However, this action cannot be undone.
Press the button to open the "Slides" menu. Press the pen next to "No title" to add a slide title. Use "History of Computer Games" as the title. Now we can move on to adding some images.
We add the images by using the button in the top toolbar. Press this button, drag it to where you want the image to be placed and drop it there. A dialog will automatically open. Press the button, browse to where you saved the image and select it for upload.
Resize the image by pulling in the lower right corner of the image. Make the image slightly smaller in size. You can move the image by using drag and drop. Place it in the top right corner.
To finish slide 1, we'll add the following text, which is paraphrased from the Wikipedia article:
"The history of video games began in the 1950s and 1960s as computer scientists began designing simple games and simulations on mainframe computers, with MIT's Spacewar! in 1962 as one of the first such games to be played with a video display. The early 1970s brought the first consumer-ready video game hardware: the first home video game console, the Magnavox Odyssey, and the first arcade video games from Atari, Computer Space and Pong, the latter of which was later made into a home console version. Numerous companies sprang up to capture Pong's success in both the arcade and the home by creating clones of the game, causing a market contraction in 1978 due to over saturation and lack of innovation."
Use the Text tool to add a block of text to the slide. Once you have dropped the text box, a dialog will appear. Insert the text above in the Edit text dialog.
We have now finished slide 1 and you should have something similar to this:
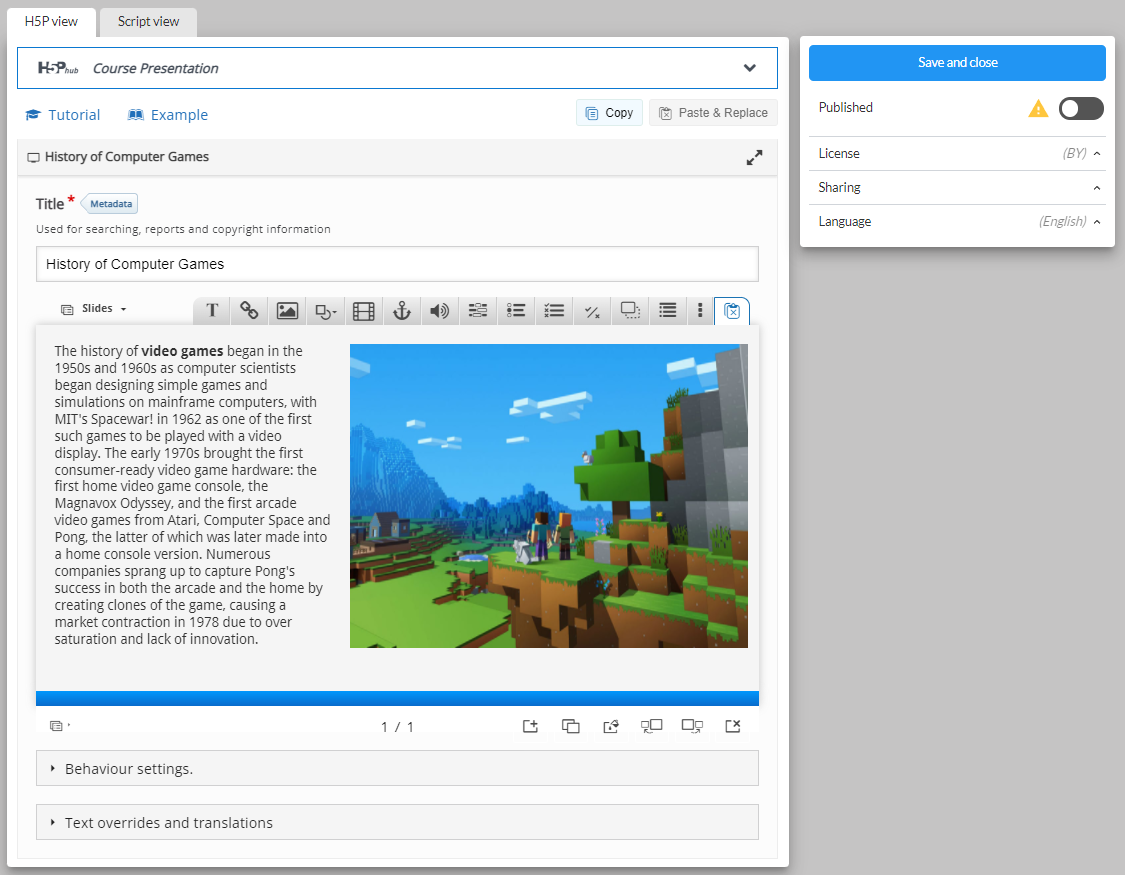
Image: Slide 1 providing an overview of the history of video games
Step 5: Slide 2
Press the button in the lower right corner of the editor to add another slide.
Slide 2 will contain information about 2D games. Add the slide title "2D Platformer Games" in the slides panel.
We'll search for relevant images in the public domain and use them. We add the images by using the button in the top toolbar. Drag the images onto the slide and upload the images. Press Done, then resize the image so you have something like this:
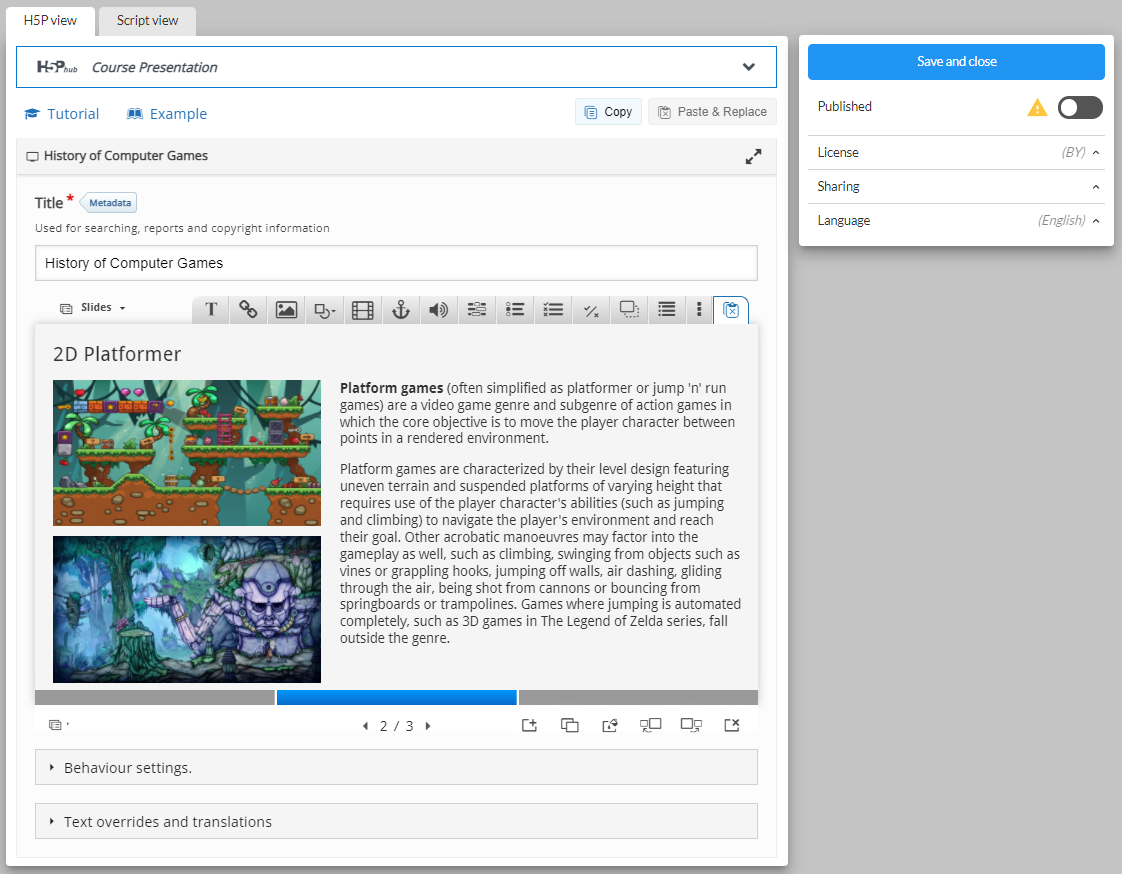
Image: Slide 2 with some 2D platformer screenshots and accompanying text
To finish slide 2, we'll add the following text, which is also paraphrased from the Wikipedia article:
"A platform game (often simplified as platformer or jump 'n' run games) is a video game genre and subgenre of action games in which the core objective is to move the player character between points in a rendered environment. Platform games are characterized by their level design featuring uneven terrain and suspended platforms of varying height that requires use of the player character's abilities, such as jumping and climbing, to navigate the player's environment and reach their goal. Other acrobatic maneuvers may factor into the gameplay as well, such as swinging from objects such as vines or grappling hooks, jumping off walls, air dashing, gliding through the air, being shot from cannons or bouncing from springboards or trampolines. Games where jumping is automated completely, such as 3D games in The Legend of Zelda series, fall outside of the genre."
As on slide 1, use the Text tool to add a text box to the slide. Once you have dropped the text box, a dialog will appear. Insert the text above in the Edit text dialog.
You can navigate between slides by pressing the slide titles in the slides panel or by using the navigation bar.
Step 6: Slide 3
Press the button to add the third slide. Slide 3 will describe 3D games. Add the slide title Uses in the slides panel.
Again, we'll use text and images to deliver our message. Unlike the previous slides, we'll place the images on both sides of the slide with the text sitting in the middle. Insert the two images together with the appropriate license information and place and resize them accordingly.
The text we'll use, is again paraphrased from the Wikipedia article:
"With the advent of 3D accelerated graphics, video games could expand beyond the typically sprite-based 2D graphics of older graphics technologies to describe a view frequently more true to reality and lifelike than their predecessors. Perspective projection has also been used in some earlier titles to present a 3D view from a fixed (and thus somewhat less hardware-intensive) perspective with a limited ability to move."
Use the Text tool to add a block of text to the slide. Once you have dropped the text box, a dialog will appear. Insert the text above in the Edit text dialog. Press Done when you're finished. Press Done. then resize and place the link box so you have something like this:

Image: Slide 3 with example screenshots of popular 3D games
We're now finished with slide 3. Finally, we'll add a Summary to finish the Course presentation.
Step 7: Slide 4
Press the button to add a fourth and final slide. Add the slide title Summary in the slides panel.
The Summary will allow the learner to make an interactive summary of the most important aspects of the previous three slides.
On the toolbar, press the button and drag a summary onto the slide. Creating a Summary is covered in this tutorial. Once you have dropped the Summary, the editor will appear. Now we'll add statements to the Summary. Press the Add statements button to add two more statement groups. In the Summary editor, the top statement in a statement group is always the correct one.
Introduction text:
- Choose the correct statement.
Statement group 1:
- They started to make computer games after the year 2000
- 2D games are more complex than 3D games to make
- 3D games normally use sprites to display animations
- 3D games require dedicated video graphic chips for better performance
- Only 3D games can have perspective
Press Done when you have added the statements. Then position and resize the Summary so you'll have something like this:
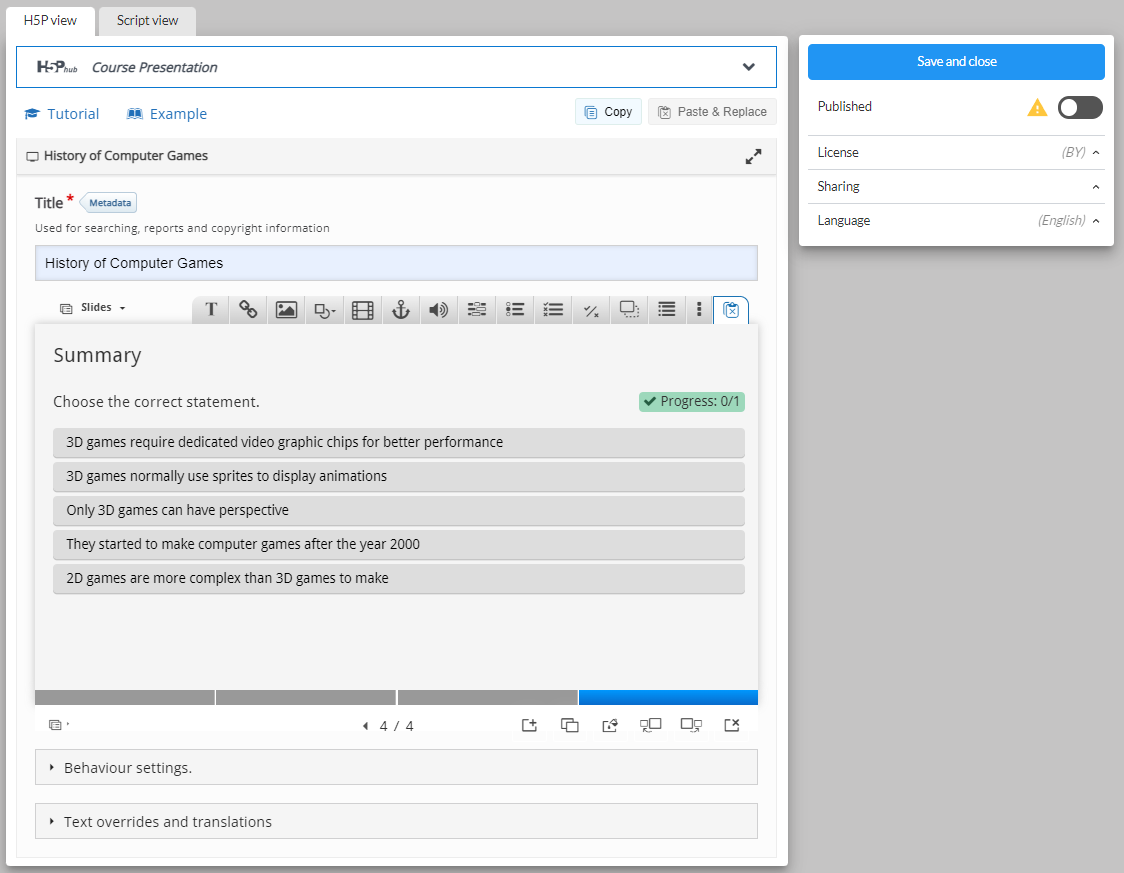
Image: Slide 4 displaying the end-of-slide Summary activity
Step 8: Finishing Up
At the bottom of the editor, you'll find the Enable show solution buttons option. In this context, the option does not have any effect.
We are continuously trying to improve Edlib's documentation. If you have any questions or suggestions then don't hesitate to join us in discussing Edlib's —ongoing and future— development. Likewise, feel free to submit issues and enhancement requests. Your help is appreciated 😉