H5P Interactive Video
Here's the Interactive video that we'll create in this tutorial:
The Interactive video content type allows you to add interactions on top of video clips. Interactions such as images, elaborating text, links and quizzes pop up while the learner watches the video.
You can watch and interact with the above H5P Interactive video.
When To Use Interactive Videos
Interactive videos are perfect when you already have a video clip that you want to enrich with interactive elements.
You can facilitate differentiated learning by adding in-depth information such as pictures, tables, text and links that the learner can interact with during video playback. Include puzzles for the learners to solve at any given time in the video by adding Multichoice questions, Fill in the blanks, Drag and drop questions and Summaries.
Step 1: Topic
We'll use a video —from Matthew Palaje, a well-known independent game developer— on mobile game developments as a basis for this tutorial.
Step 2: Video Files
A video clip is the cornerstone of any interactive video.
You can check which browsers support the MPEG-4 video format over at Can I Use. In order to convert the MPEG-4 video to a WebM format, you can use an open-source converter such as Miro.
Step 3: Creating an Interactive Video
Select the New content option and choose Interactive video from the list of content types:
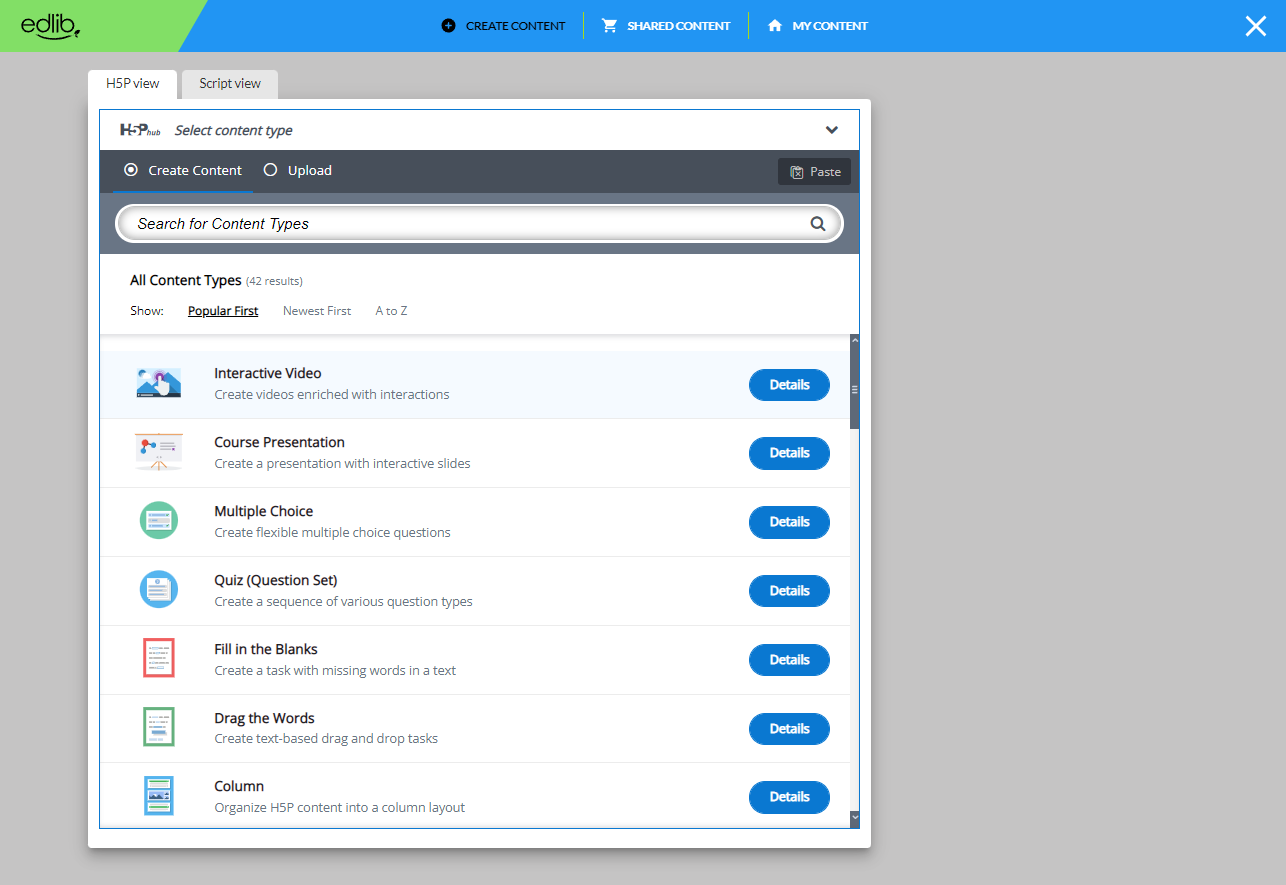
Image: H5P content type selector
Step 4: Interactive Video Editor
The Interactive video editor should now appear. The top part of the editor looks like this:
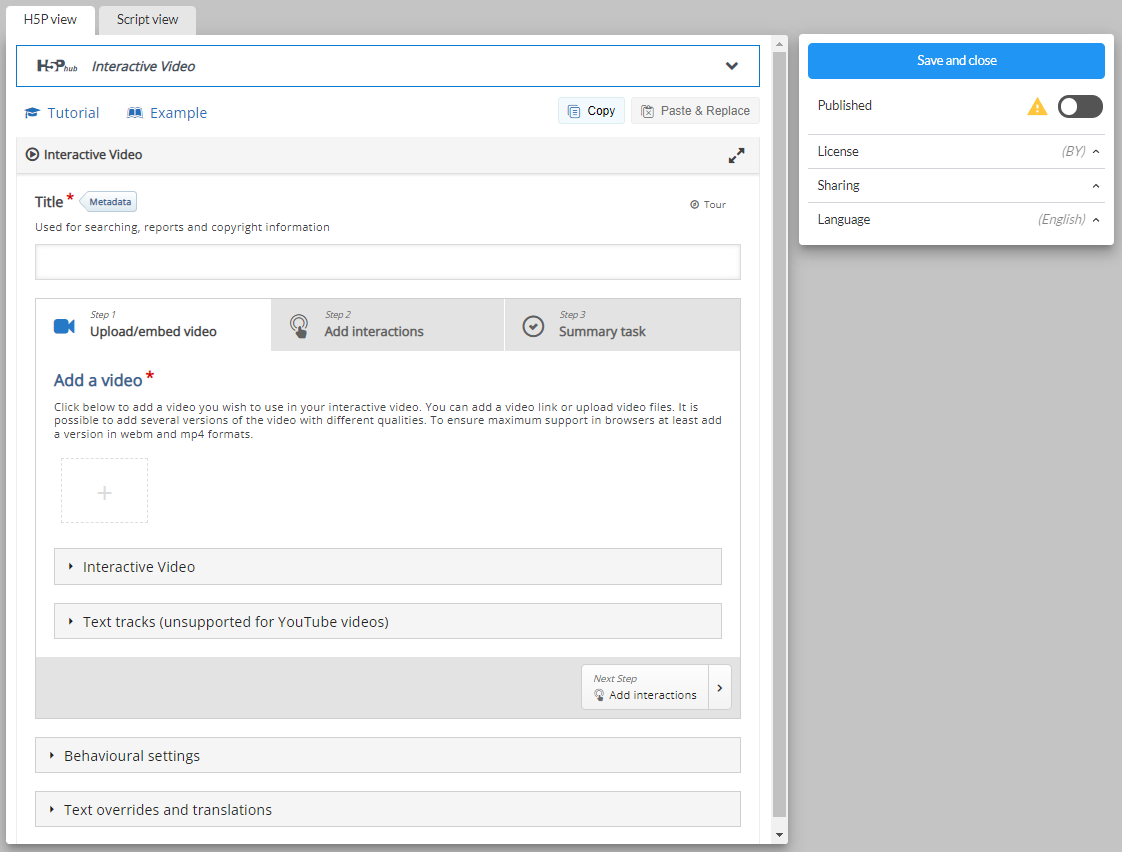
Image: Blank H5P Interactive video editor
In this tutorial, we'll focus on creating the interactive elements in the video. Therefore, we'll focus on the top part of the editor, above the Common fields header.
The Interactive video content type consists of three tabs:
- Upload video
- Add interactions
- Summary task
These three steps represent a natural workflow for creating an Interactive video. By default, the Upload video tab is displayed when you create a new Interactive video, and this is what you always want to start off with.
Step 5: Upload Video
Here's where we add the video clips that our Interactive video is based on. Press the "+" button and then press the "Upload video file" button or simply paste the link to a publicly available —and appropriately licensed— video:
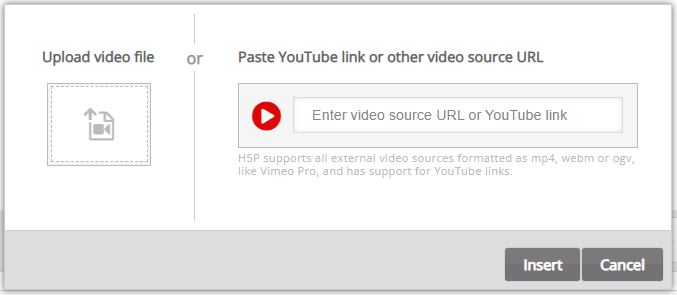
Image: Adding a video file, video source URL or YouTube link
If you chose to upload a video file then browse to where you downloaded the MPEG-4 video file from step 1 and upload the video:

Image: Alternative video qualities
Press the plus button again to add an alternative video format in WebM format to ensure support in all browsers.
Step 6: Add Interactions
Press the Add interactions tab in the top of the editor. The video clip we added in the previous step is previewed:
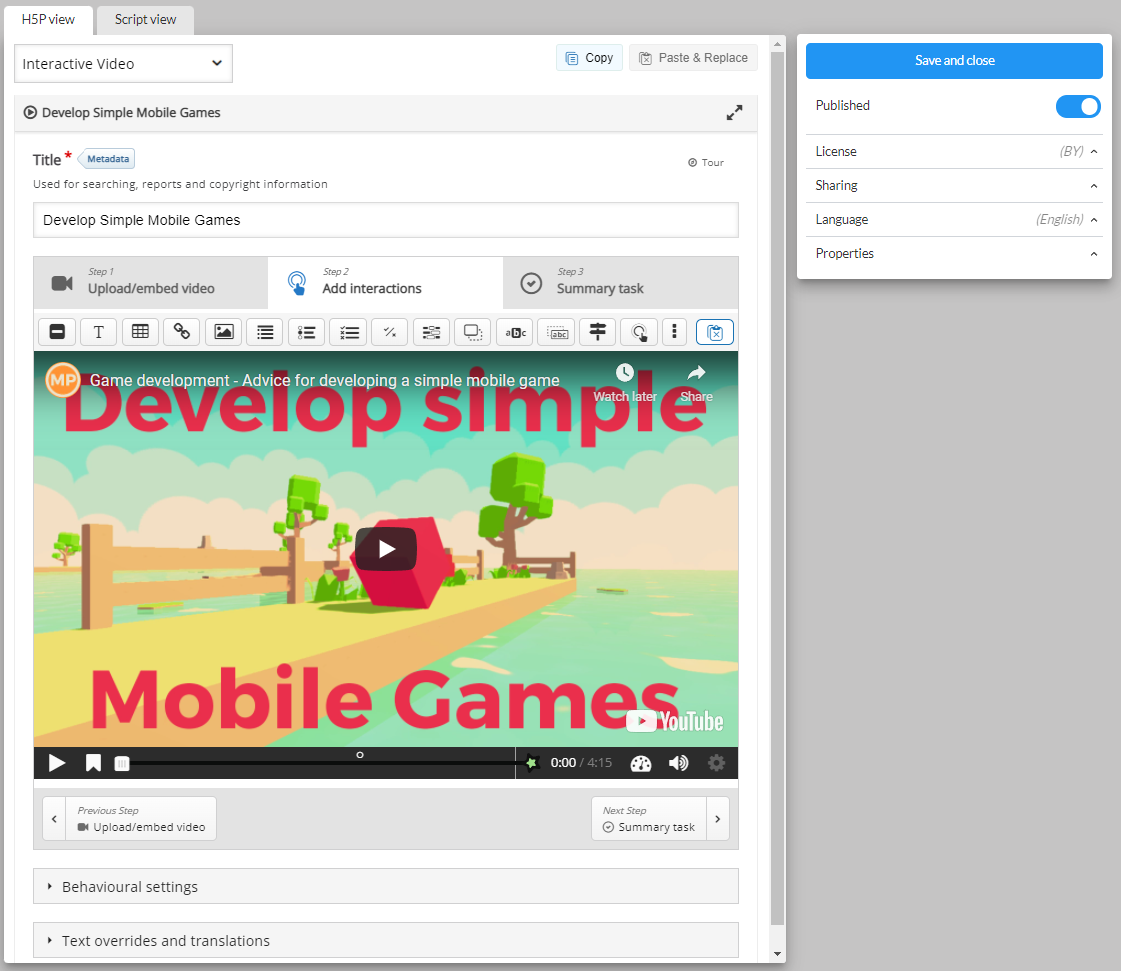
Image: Video preview
We use the toolbar above the video clip to add interactions:

Image: Interactive video toolbar
In this tutorial, we'll add a text and an image interaction.
Step 6a: Text Interaction
We'll add a short text about Unity's editor and Visual Studio code — fundamental tools when developing games with Unity.
First, add a Text interaction by pressing the text button on the toolbar, then drag it on top of the video and drop it in the middle of the video. A dialog will appear when you drop the interaction.
We want the Text interaction to be visible at approximately one minute into the video. Type in 1:03 as start time and 1:13 as end time in the Display time field. In this case, we don't want the video to stop automatically when the interaction appears, so we'll leave the Pause checkbox unchecked.
The Label is a text that will be displayed next to the Interaction icon as a short description of what the learner can expect to find in the interaction. Type "Development environments" in the Label field. In the Text field, we'll add the actual in-depth information text about development environments:
"Game development in Unity is done with both the Unity editor and Visual Studio. The editor is primarily focused on the more visual part of game development, including things like scenes, lighting, animation and so forth. Visual Studio, on the other hand, is used for the actual writing and debugging code side of things."
Press Done. You will now see that an icon with the Label "Development environments" has been added to the video together with a white dot on the timeline below the video, to indicate that interaction is available at this point in the video:
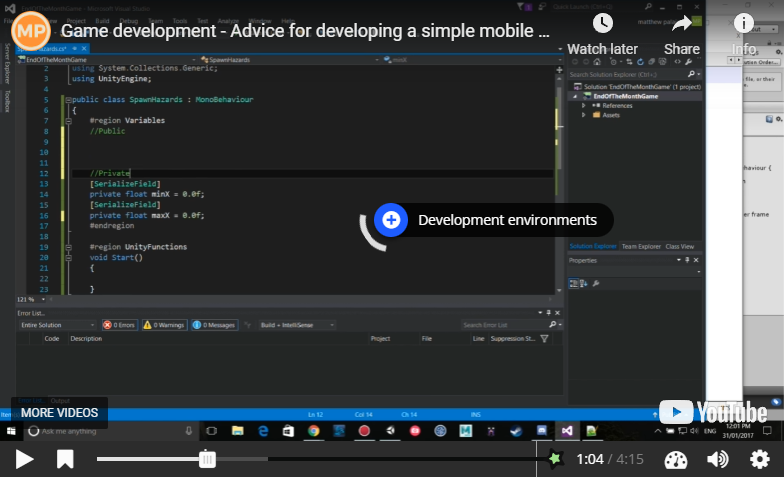
Image: Interactive video text interaction
Play the video to make sure the interaction is visible at the correct time.
Double-press on interaction icons to edit interactive elements.
Step 6b: Image Interaction
We'll add two image interactions showing other game development engines which the learner can view by pressing on the image icons.
You can add an image interaction in the same way we added the text interaction. Press the Image button, drag it onto the video and drop it where we want it to be placed.
In the first image interaction, we add image of the Unreal Engine game engine. In the Display time field, insert 0:03 - 0:03. This time we'll check the Pause checkbox so that the video pauses when the interaction appears. Add the label "Unreal Engine". Also, use "Unreal Engine" for the Alternative text and Hover text fields. Press Done.
Finally, add the image of the Godot game engine and use the same settings as for the first image interaction shown above. Press Done when you have added the Godot engine image interaction. You can move the interactions around by using drag and drop. Place them so you have something like this:
Pending
You can also add Multichoice questions, Fill in the blanks, Drag and drop questions and Summaries in Interactive videos. You add and place them in the same way as the Text and Image interactions. Please read the individual tutorials for these content types to learn more about creating them.
Step 7: Video Summary
Pending
Step 8: Bookmarks
Pending
Step 9: Wrapping Up
Pending
We are continuously trying to improve Edlib's documentation. If you have any questions or suggestions then don't hesitate to join us in discussing Edlib's —ongoing and future— development. Likewise, feel free to submit issues and enhancement requests. Your help is appreciated 😉